How to Load a Bambu Filament Refill onto a Reusable Spool
Load an original Bambu 1 kg refill: align the core, lock the reusable spool, secure the tip and remove the restraint in the correct order.

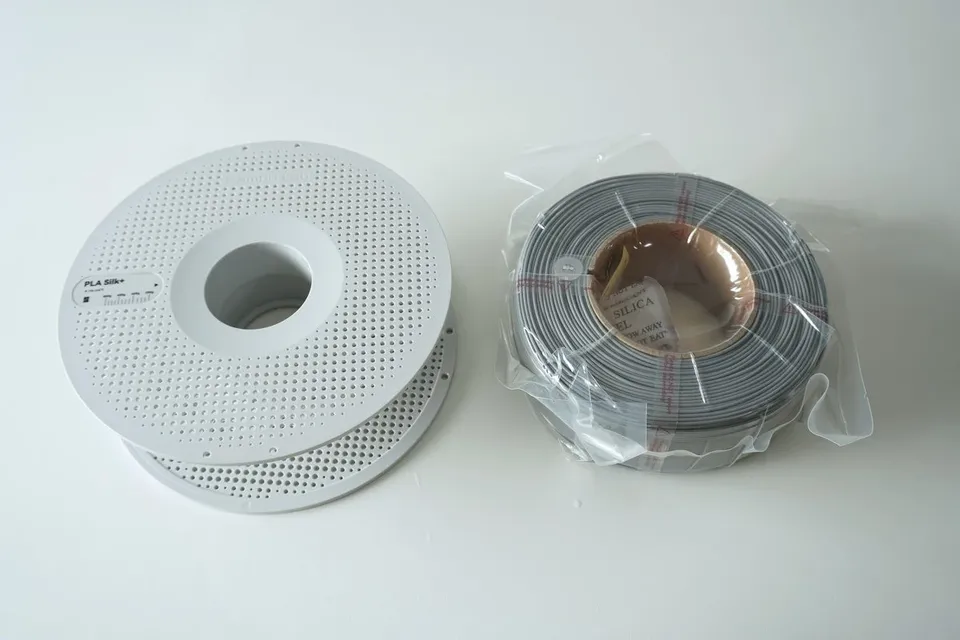
Keep a Bambu filament refill restrained until the reusable spool is assembled around it. Removing the retaining wrap while the coil is still loose creates an avoidable handling problem: the spool flanges are supposed to contain those turns before the wrap comes away.
This procedure covers an original Bambu Lab 1 kg refill and the original compatible reusable spool. Small refills and printed spool designs can have different core, latch or spacer instructions. Use their own assembly guide rather than adding those steps to this one.
Make room for both spool halves
Clear a flat work area large enough to set down the coil and the two halves without balancing anything on the edge of the printer. Keep the refill's protective wrap in place while unpacking it. Put the new material label somewhere clean so it will still be available after assembly.
Inspect the empty reusable spool before loading. Look for damaged locking features, debris in the joint or a flange that no longer sits flat. A refill will not repair an already damaged spool. If the previous material's label remains attached, plan to replace it rather than relying on memory once several reels are stored together.
The reference sequence is Bambu Lab's official reusable-spool loading guide. Keep it available for the component details, especially if your packaging looks different from the photographs.
Open, align and lock before releasing the coil
Rotate the empty spool counterclockwise to separate its halves. Identify the wider half and the locating feature that engages the refill's cardboard core. Keep the restrained refill supported while aligning that feature with the core's notch, then seat the refill fully. Do not force a half that is visibly sitting on top of the notch.
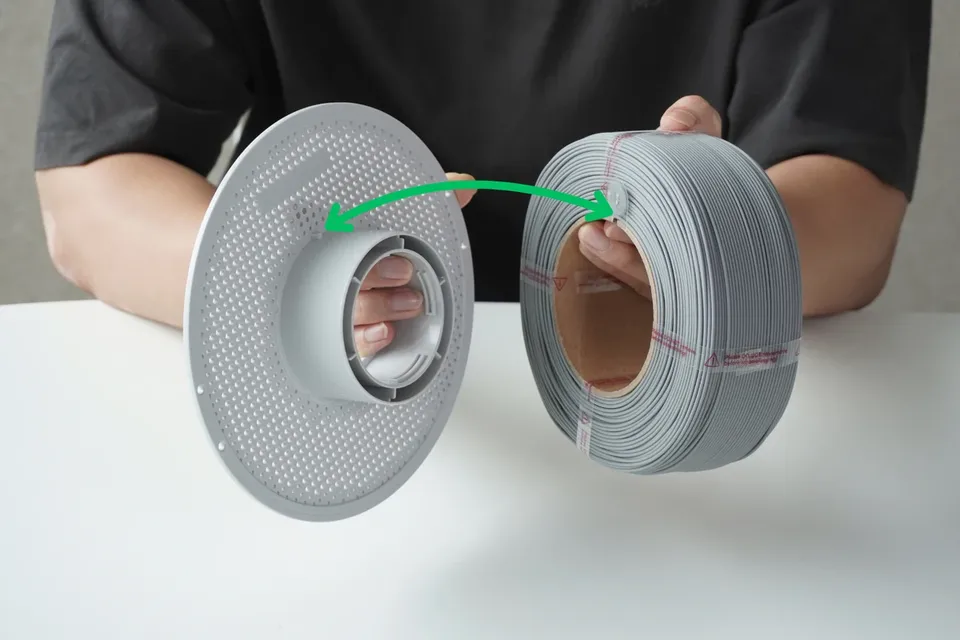
Fit the narrower half and turn it clockwise until the locking mechanism engages with a click. The joint needs to be completely assembled before you remove the restraint. Check the meeting edges around the hub; an uneven joint deserves another look while the coil is still contained.
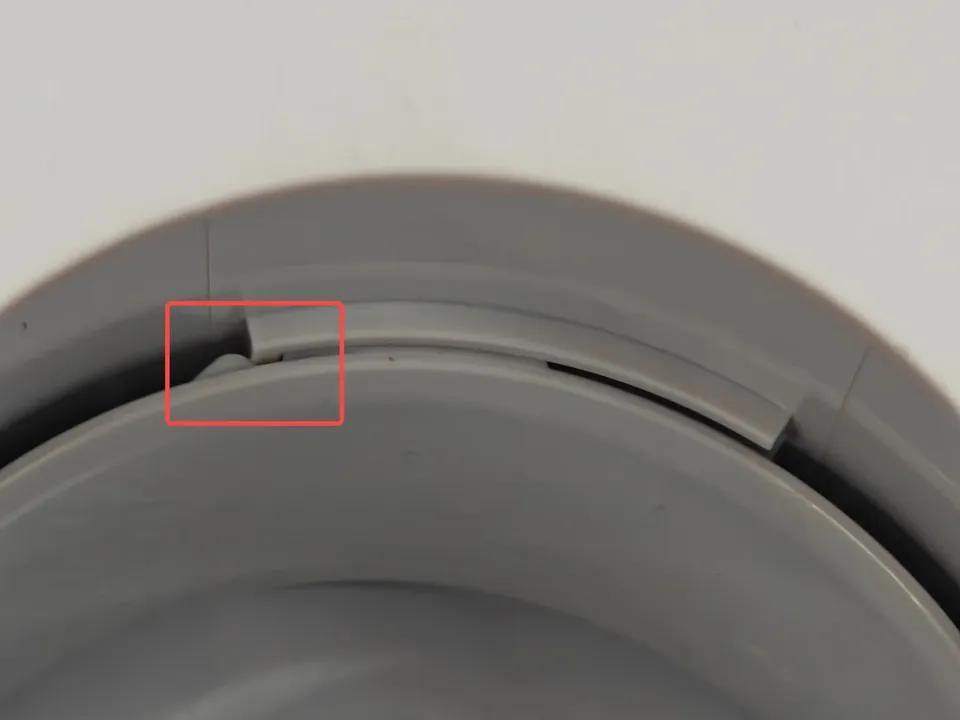
A useful pause here is to set the assembled reel flat and inspect both sides. The cardboard core should be seated between the flanges, with no obvious tilted gap at the hub. If something looks wrong, correct the alignment now rather than attempting to hold an unwrapped coil together while reopening the spool.
Control the tip, then remove the remaining wrap
The order around the leading end matters. For the protective-wrap version shown, free the section nearest the filament end, secure the tip in the spool's round hole, and then remove the rest of the restraint. If your refill instead holds its end with tape and has no protective strap, follow the corresponding branch in Bambu's guide. Packaging variations are a reason to check the supplied instructions.
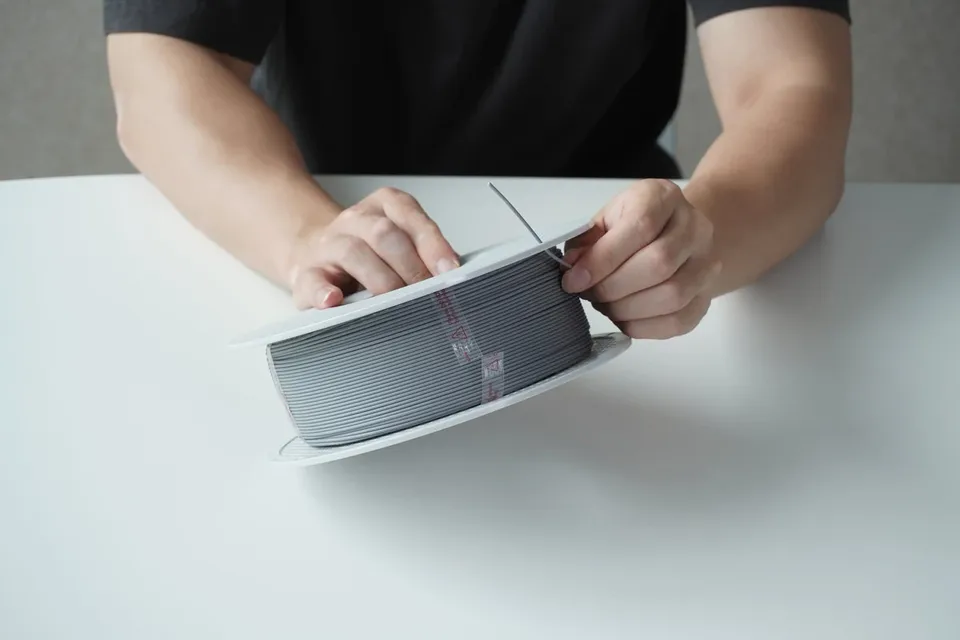
Keep the reel supported while taking off the remaining material. Pulling a long strip in mid-air makes the whole coil harder to control. Watch the point where the strip passes the outer turns; if a turn moves with it, stop and support that area before continuing.
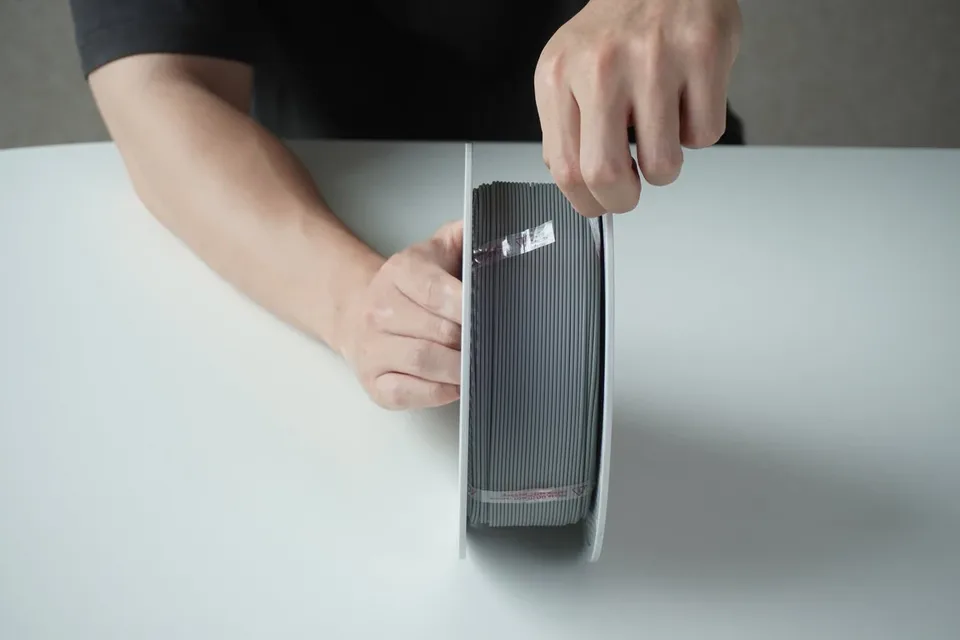
Do not let the free tip spring away while removing tape or changing your grip. A controlled end is easy to move to the printer later. An end that disappears under another turn creates a separate problem that assembly alone will not solve.
Settle the coil and replace the label
Check the outer edges for a gap between the wound filament and a spool flange. Bambu's procedure includes pressing the coil edges into place. Work evenly and keep the tip secured; avoid pulling individual loops out to make one patch look tidier.
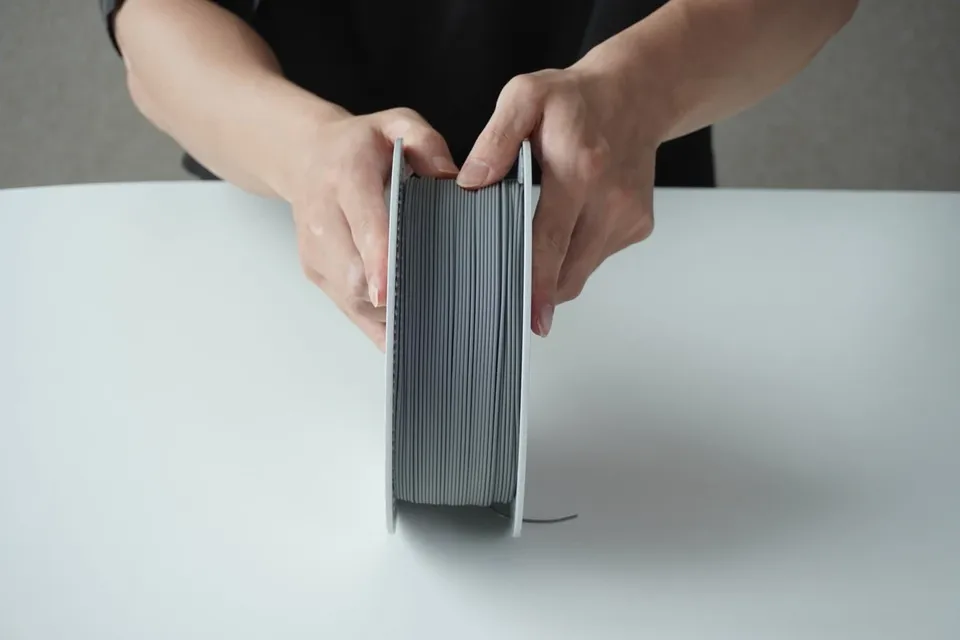
Replace the old material label with the new one. Include the material identity where it can be read in storage, rather than identifying it solely by colour. Grey PLA and grey PETG may look similar on the shelf, but their printer profiles and drying requirements are different.
If a turn has already crossed over the end, deal with it before loading. The filament-untangling procedure explains how to keep the end controlled while locating a crossover. Turning the spool rapidly and hoping the obstruction disappears can hide the point that needs attention.
Check the completed reel in its actual feeder
Assembly and feeder compatibility are separate checks. Confirm that the loaded spool rotates freely in the holder or feeder you intend to use. Keep the end secured until you are ready to guide it into the feeding path, then follow that device's loading procedure.
For an AMS, identify the exact model before assuming every Bambu-branded reel and material will behave the same way. The AMS spool compatibility checks cover dimensions and the differences between systems. A spool that fits mechanically does not establish that the filament itself is supported by that feeder.
During the first loading attempt, observe the reel as well as the filament tip. A flange rubbing on the housing, a loose outer loop and an unlocked hub are different faults. Stop at the visible obstruction and correct it with the end under control. Pulling harder on the filament does not correct a spool assembly problem.
Put an unfinished refill away as a loaded reel
If the new material will not be used immediately, leave it on the assembled spool with the tip secured. Store the identifying label with the reel and follow the material's moisture guidance. The filament storage checklist helps organize bags, containers and handling after loading.
Before carrying it to storage, make one final physical check: both halves locked, the coil contained between them, the free end retained and the correct label visible. That gives the next loading session a clear starting point without needing to reconstruct what happened to a loose coil.
Our standard: Clear sources, practical limits, and no invented test results. Read our editorial policy.
Lucas Hayes
Lucas plans the space around the printer: workbenches, ventilation, filament storage, tools, enclosures, power, and everyday workflow.